Welcome
, welcome to HappyKitchens.com. We update our site often and would encourage you to visit often as well. The sole purpose of this site is to assist you with your kitchen remodeling plans. You can click on the various tabs above for helpful information of each category listed. You may also click on the highlighted links found in the body of text found throughout this site.
My name is Jan Drolshagen; I have been a cabinetmaker for over 20 years and have employed my skills in remodeling kitchens and bathrooms for 18 of those years. When I think of remodeling a kitchen I try to look at it from the client’s perspective, I try to envision the order in which I would go about it. Although each project has its own inherent challenges, the process is more or less the same.
The tips that are incorporated here are meant only to be a guide, and to make the process easier for you. I cannot presume to tell you what it is that you like or dislike, however I can share with you what my experience has been and what has worked for others.
You will find a form for your convenience when you click the getting started tab. This form is laid out in an order conducive to the order in which I generally go about organizing a kitchen-remodeling project while discussing the options with my clients.
Think of me as your technician when it comes to employing my skills to remodel your kitchen. I can help in the layout and design, however my greatest asset is my ability to create what it is that you have in mind, utilizing your existing cabinets, adding to or modifying them, or installing new cabinets, countertops, flooring, etc.
Warmest regards and thank you for visiting our site,
Jan Drolshagen
Cabinet Maker
Current Projects
Gordon Kitchen
Looking for a Kitchen Pro!!!! Help!!! This is how Erin introduced herself to me via E-mail. Subsequent E-mails brought us together for a meeting and a plan was developed to move forward. As the scope of the project began to take shape, it became obvious that she had an artistic way of looking at things. Later I learned that she is indeed an artist and a very talented one at that.
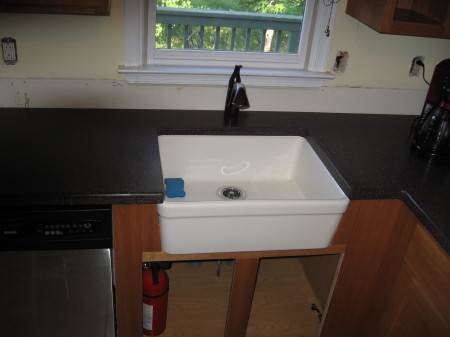
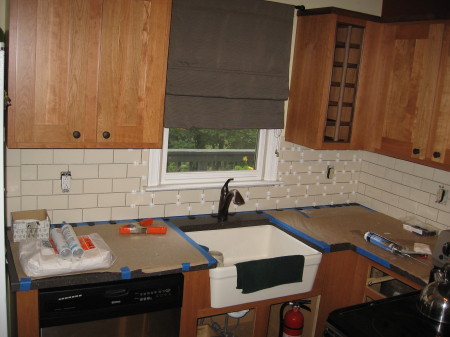
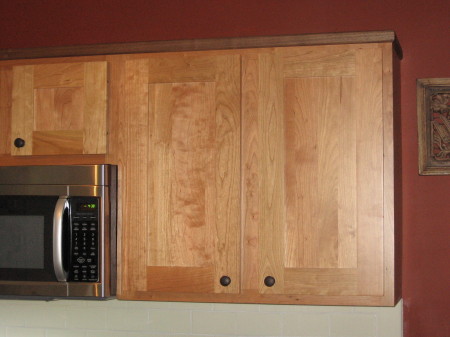
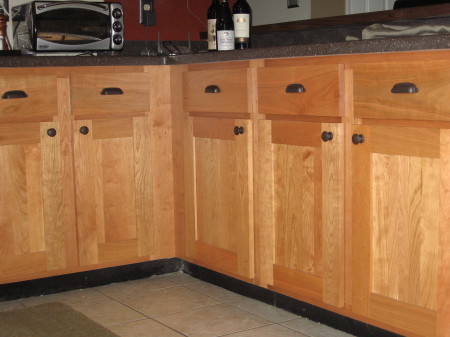
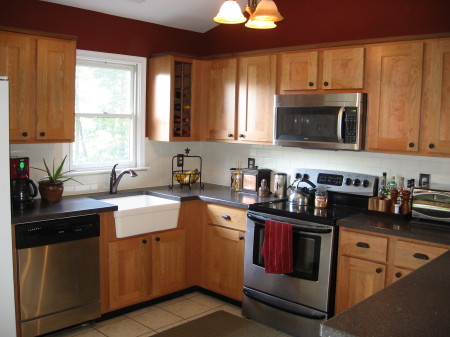
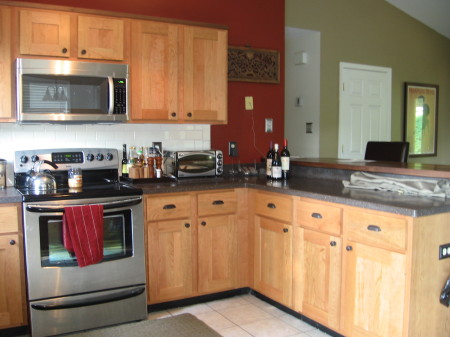
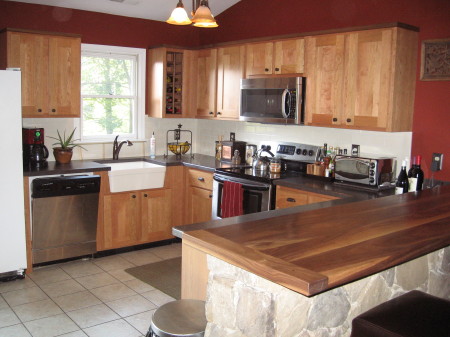
Once we came to an understanding of just exactly was expected, I went about ordering material. The countertop was Corian (Cocoa Brown) with an off-white porcelain farm sink. The cabinets were to be re-faced with a real wood (natural cherry) finish with doors and drawer fronts to match. She had decided on a custom 3" doorframe with flat inverted panels.
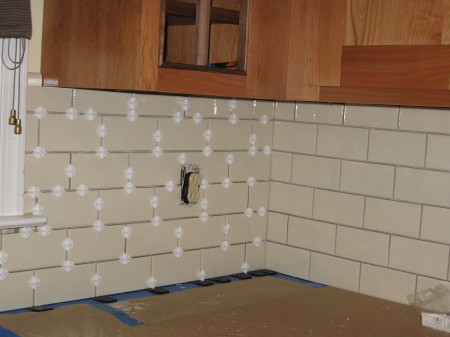
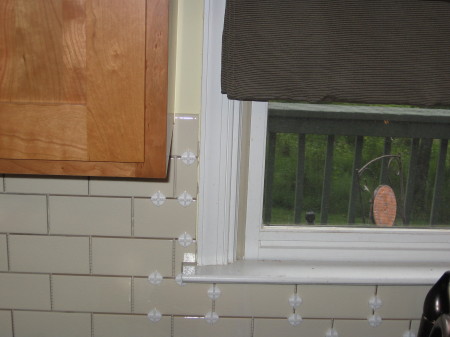
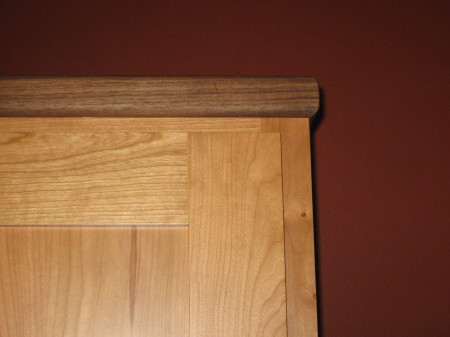
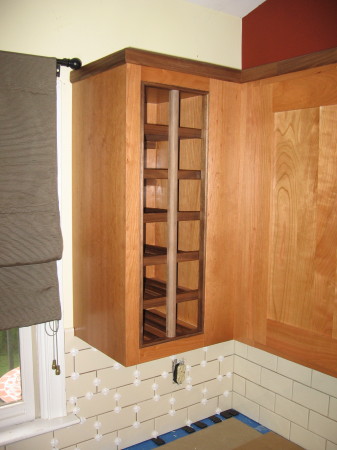
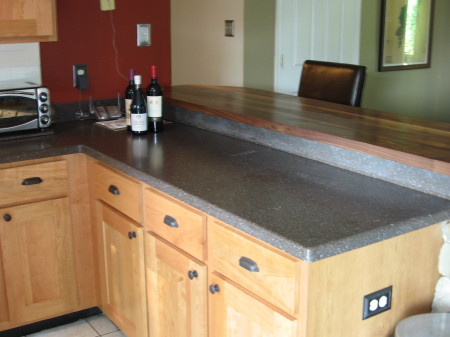
The design incorporated clean lines, warm wood tones and subtle details, our goal accomplished; we added an alabaster subway tile back splash with a crackled finish, laid out in a brick pattern. The finishing touches included oil rubbed bronze knobs/pulls and faucet as well as a hand-made walnut bar top with a breadboard end. A simple rounded over piece of walnut crown capped the newly re-faced cabinets. One of the smaller upper cabinets was converted into a wine rack where we were once again able to take advantage of the walnut, thus bringing the whole design together.


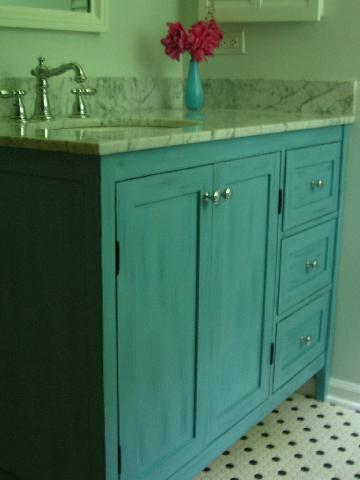
Houchens' Vanity Cabinet
I was asked to build a cabinet similar to one that the Houchens had seen in a Pottery Barn catalog.They needed it to be built taller in height and smaller in width, and configured to locate the sink in the center of a permanently mounted mirror. Under the sink were to be two flush mounted doors and on the right were to be three flush mounted drawers, all of equal size. The legs were to be tapered and the cabinet body was to sit off the floor approximately 5".
After agreeing on the design, I made a detailed drawing of the cabinet and went about building it. First the cabinet body was constructed using dowel pin joinery after which I constructed two reversed raised panel doors built for stability and three similar drawer fronts. The drawers are built with 3/4" dove tail clear pine sides and 1/2" cabinet grade plywood bottoms, one again for strength and stability. I installed full exposure drawer slides allowing for the entire drawer to be accessible when pulled out.
It had been decided to create a distressed finish, again found in a magazine. I was able to accomplish this by first applying a flat black paint to the cabinet components, then I painted a French blue flat paint over the black. When this had sufficiently dried I used a rough piece of used sandpaper to indiscriminately sand the edges and panels revealing the black paint underneath thus giving us the distressed appearance we were looking for. I then coated the entire cabinet, doors and drawer fronts with a clear glaze, giving it some depth and a satin finish.
The cabinet was modified in the back to accommodate the plumbing, set in place and fastened to the wall. The carera marble top and sink arrived from the fabricator and were installed. The faucet was then installed and hooked up to the plumbing and the job was complete.